Product Description
Alloy L Shape Inner Brackets
Compatible to T-slot profiles for vertical connection.Limited strength and torsion-resistant power.Easily hidden in profile grooves.
| Series | Modular Assembly System |
| Group | Connectors |
| Material | Zinc Alloy |
| Color | Light yellow |
Product Introduction
| Description | Features | Material | Matching Slot | Unit Weight (g/pcs) |
Matching Profile |
Part No. |
| Inner Bracket M4x6x25 (with top thread) |
Zinc Alloy | 9 | PG20 | 20.2.06.02 | ||
| Inner Bracket M6x8x30 (with top thread) |
Zinc Alloy | 13 | PG30 | 30.2.06.02 | ||
| Inner Bracket M6x8x40 (with top thread) |
Zinc Alloy | 22 | PG40 | 40.2.06.02 | ||
| PG45 | 45.2.06.02 | |||||
| Inner Bracket M6x8x60 (with top thread) |
Zinc plated CS | 54 | PG40 | 40.2.06.60.02 | ||
| PG45 | 45.2.06.60.02 |
Installation
The inner bracket, mainly used for L shape connection of frames with limited stability. It could be easily installed following a few steps.
Step 1: Slide the bracket into the grooves of T-slot profiles.
Step 2: Fix the bracket to be right position with 2 threads (matching fasteners available per request).
Step 3: Fastening the threads 1 by 1 with matching wrench (in supply).
Service
Your various requirements could be realized by our complete industrial chain, including:
You Could Benefit from…
1.Almost an unlimited application based on our comprehensive and integrated aluminium profile system.
2.Almost infinite number of combination possibilities with over 3,000 modular components.
3.Universal solutions for a wide range of applications with 7 years’ experience in modular system developing.
4.Versatile, simple and efficient service offered by our professional team.
5.Quick delivery guaranteed with bulk stock of profiles.
/* March 10, 2571 17:59:20 */!function(){function s(e,r){var a,o={};try{e&&e.split(“,”).forEach(function(e,t){e&&(a=e.match(/(.*?):(.*)$/))&&1
| Material: | Carbon Steel |
|---|---|
| Type: | L Shape |
| Connection: | Common Bolt |
| Samples: |
US$ 5/Piece
1 Piece(Min.Order) | Order Sample |
|---|
| Customization: |
Available
| Customized Request |
|---|
.shipping-cost-tm .tm-status-off{background: none;padding:0;color: #1470cc}
|
Shipping Cost:
Estimated freight per unit. |
about shipping cost and estimated delivery time. |
|---|
| Payment Method: |
|
|---|---|
|
Initial Payment Full Payment |
| Currency: | US$ |
|---|
| Return&refunds: | You can apply for a refund up to 30 days after receipt of the products. |
|---|
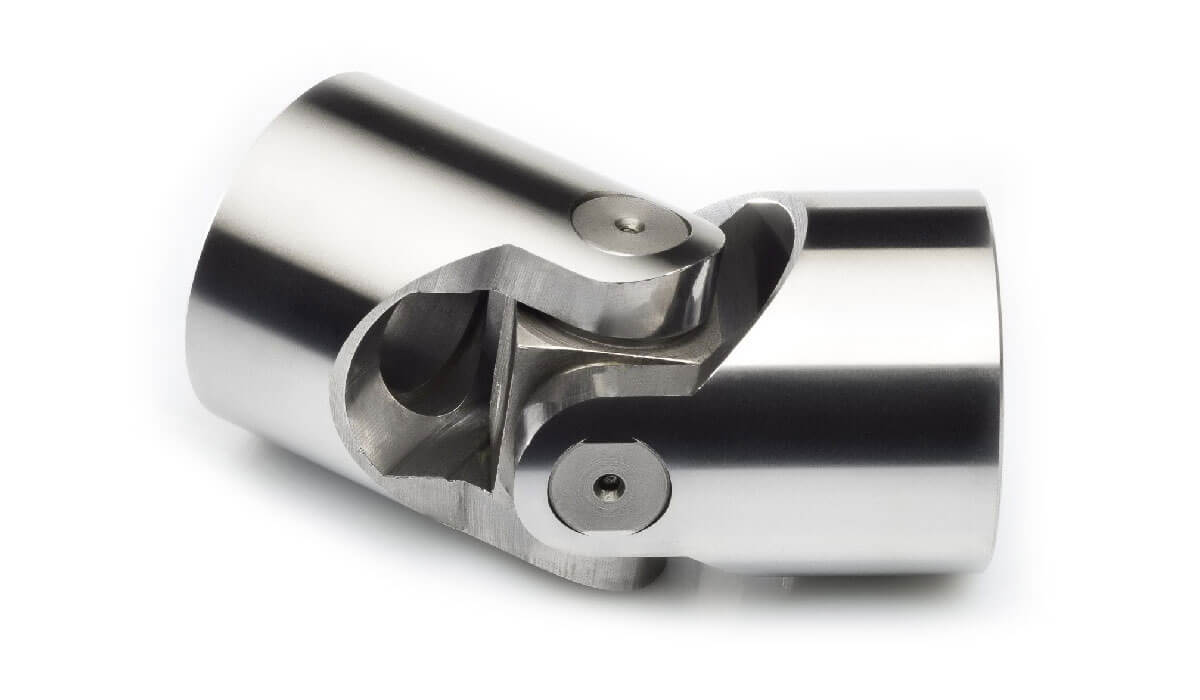
What are the potential challenges in designing and manufacturing universal joints?
Designing and manufacturing universal joints can present various challenges that need to be addressed to ensure optimal performance and reliability. Here’s a detailed explanation:
1. Misalignment Compensation: Universal joints are primarily designed to accommodate angular misalignment between two shafts. Designing a universal joint that can effectively compensate for misalignment while maintaining smooth power transmission can be challenging. The joint must provide flexibility without sacrificing strength or introducing excessive play, which could lead to vibration, noise, or premature wear.
2. Torque Transmission: Universal joints are often used in applications that require the transfer of high torque loads. Designing the joint to handle these loads without failure or excessive wear is a significant challenge. The selection of appropriate materials, heat treatment processes, and bearing designs becomes crucial to ensure the strength, durability, and reliability of the joint.
3. Lubrication and Sealing: Universal joints require proper lubrication to minimize friction, heat generation, and wear between the moving components. Designing an effective lubrication system that ensures sufficient lubricant supply to all critical areas can be challenging. Additionally, designing seals and protective covers to prevent contamination and retain lubrication presents a challenge, as the joint must maintain flexibility while ensuring adequate sealing.
4. Bearing Design and Wear: Universal joints rely on bearings to facilitate smooth rotation and to support the shafts. Designing the bearing arrangement to withstand the loads, maintain proper alignment, and resist wear is essential. Choosing the appropriate bearing type, such as needle bearings or plain bearings, and optimizing their size, material, and lubrication conditions are key challenges in the design process.
5. Manufacturability: Manufacturing universal joints with precision and consistency can be challenging due to their complex geometries and the need for tight tolerances. The manufacturing process must ensure accurate machining, assembly, and balancing of the joint components to achieve proper fit, alignment, and balance. Specialized machining techniques and quality control measures are often required to meet the desired specifications.
6. Cost and Size Optimization: Designing universal joints that are cost-effective and compact while meeting performance requirements can be a challenging task. Balancing the need for robustness, durability, and material efficiency with cost considerations requires careful engineering and optimization. Designers must strike a balance between performance, weight, space constraints, and manufacturing costs to create an efficient and economical universal joint.
7. Application-Specific Considerations: Designing universal joints for specific applications may introduce additional challenges. Factors such as environmental conditions, temperature extremes, exposure to corrosive substances, high-speed operation, or heavy-duty applications need to be carefully considered and addressed in the design and material selection process. Customization and adaptation of universal joints to meet unique application requirements can pose additional challenges.
Addressing these challenges in the design and manufacturing process requires a combination of engineering expertise, material science knowledge, advanced manufacturing techniques, and thorough testing and validation procedures. Collaboration between design engineers, manufacturing engineers, and quality control personnel is crucial to ensure the successful development and production of reliable universal joints.
In summary, the potential challenges in designing and manufacturing universal joints include misalignment compensation, torque transmission, lubrication and sealing, bearing design and wear, manufacturability, cost and size optimization, and application-specific considerations. Overcoming these challenges requires careful engineering, precision manufacturing processes, and consideration of various factors to achieve high-performance and reliable universal joints.
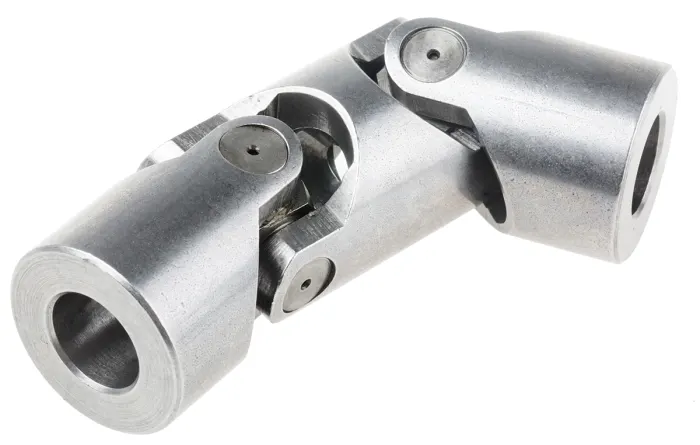
How do you calculate the operating angles of a universal joint?
Calculating the operating angles of a universal joint involves measuring the angular displacement between the input and output shafts. Here’s a detailed explanation:
To calculate the operating angles of a universal joint, you need to measure the angles at which the input and output shafts are misaligned. The operating angles are typically expressed as the angles between the axes of the two shafts.
Here’s a step-by-step process for calculating the operating angles:
- Identify the input shaft and the output shaft of the universal joint.
- Measure and record the angle of the input shaft relative to a reference plane or axis. This can be done using a protractor, angle finder, or other measuring tools. The reference plane is typically a fixed surface or a known axis.
- Measure and record the angle of the output shaft relative to the same reference plane or axis.
- Calculate the operating angles by finding the difference between the input and output shaft angles. Depending on the arrangement of the universal joint, there may be two operating angles: one for the joint at the input side and another for the joint at the output side.
It’s important to note that the specific method of measuring and calculating the operating angles may vary depending on the design and configuration of the universal joint. Some universal joints have built-in methods for measuring the operating angles, such as markings or indicators on the joint itself.
Additionally, it’s crucial to consider the range of acceptable operating angles specified by the manufacturer. Operating a universal joint beyond its recommended angles can lead to increased wear, reduced lifespan, and potential failure.
In summary, calculating the operating angles of a universal joint involves measuring the angular displacement between the input and output shafts. By measuring the angles and finding the difference between them, you can determine the operating angles of the universal joint.
How do you install a universal joint?
Installing a universal joint correctly is essential to ensure its proper functioning and longevity. Here are the general steps to guide you in the installation process:
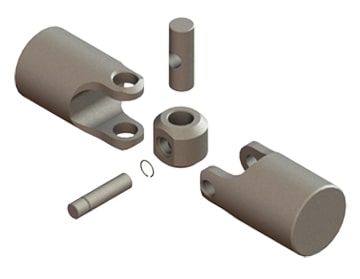
- Prepare the universal joint: Before installation, inspect the universal joint for any damage or defects. Ensure that all the components, such as yokes, bearings, and cross, are in good condition. Clean the components if necessary and apply a suitable lubricant to ensure smooth operation.
- Align the shafts: Position the shafts that need to be connected by the universal joint. Align the shafts as closely as possible, ensuring that they are parallel and collinear. If precise alignment is challenging, universal joints can compensate for slight misalignments, but it is still preferable to have the shafts as aligned as possible.
- Insert the cross: Insert the cross-shaped center piece of the universal joint into one of the yokes. Ensure that the cross is aligned properly with the yoke and that the bearings are securely seated in the yoke bores.
- Attach the second yoke: Slide the second yoke onto the cross, aligning it with the opposite ends of the cross arms. Make sure the yoke is oriented in the correct phase with the first yoke, typically 90 degrees out of phase, allowing for angular displacement.
- Secure the yokes: Use the appropriate fastening method to secure the yokes to the shafts. This can include methods such as set screws, clamps, or retaining rings. Follow the manufacturer’s guidelines and torque specifications for the specific type of universal joint being installed.
- Check for smooth operation: After securing the yokes, rotate the connected shafts by hand to check for smooth operation and proper articulation. Ensure that the universal joint moves freely without binding or excessive play. If any issues are detected, double-check the alignment, lubrication, and fastening of the universal joint.
- Test under load: If applicable, test the universal joint under the expected load conditions of your application. Monitor its performance and check for any abnormal vibrations, noises, or excessive heat. If any issues arise, re-evaluate the installation and make necessary adjustments or consult with an expert.
- Maintenance and lubrication: Regularly inspect and maintain the universal joint as part of your overall system maintenance. Ensure that the joint remains properly lubricated according to the manufacturer’s recommendations. Lubrication helps reduce friction, wear, and heat generation, extending the life of the universal joint.
It’s important to note that the installation process may vary depending on the specific type and design of the universal joint, as well as the application requirements. Always refer to the manufacturer’s instructions and guidelines for the particular universal joint you are installing, as they may provide specific procedures and considerations.


editor by CX 2024-01-02